Your gutters work hard all year, but if your downspouts just dump water right next to your house, you’re basically inviting your foundation to crack, your basement to flood, and your wallet to cry. I learned this the hard way after ignoring a soggy corner of my yard for two seasons — spoiler: it didn’t fix itself. The good news? There are some genuinely clever downspout drainage solutions that actually work, and most of them won’t break the bank.
1. Extend Your Downspouts Away from the Foundation
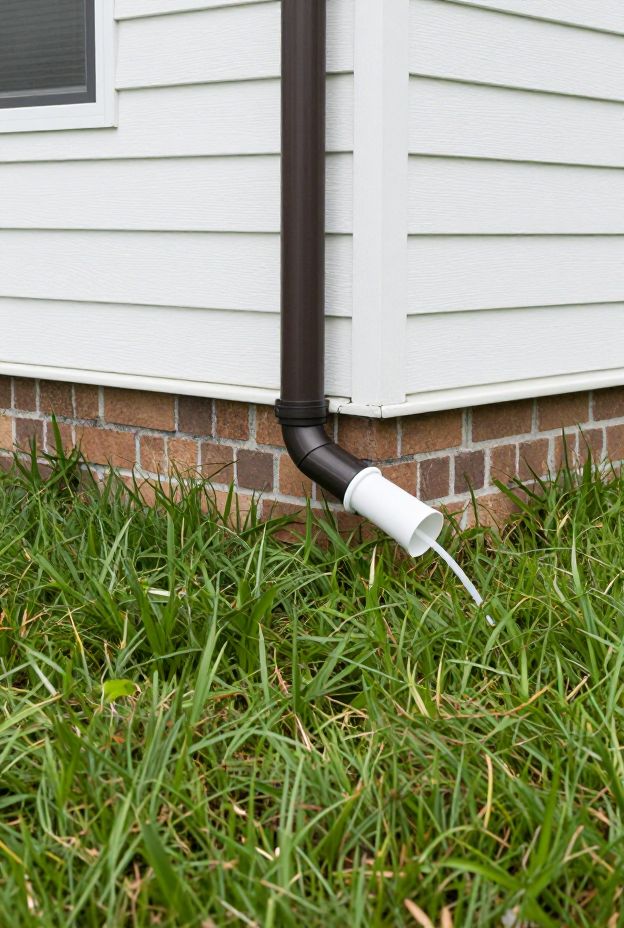
This is the simplest fix, and honestly, if you’re not doing this already, it’s the first thing you need to tackle. Downspout extensions push water at least 4–6 feet away from your foundation, which dramatically reduces the risk of water seeping into your basement or crawl space.
You can grab a basic plastic extender at any hardware store for just a few dollars. They’re not glamorous, but they get the job done fast. Just make sure the extension slopes downward so water doesn’t pool.
IMO, this is the single easiest win in foundation drainage — low cost, low effort, high payoff.
- Minimum extension length: 4–6 feet from the foundation
- Slope requirement: At least 1 inch of drop per 10 feet
- Best for: Quick fixes on a tight budget
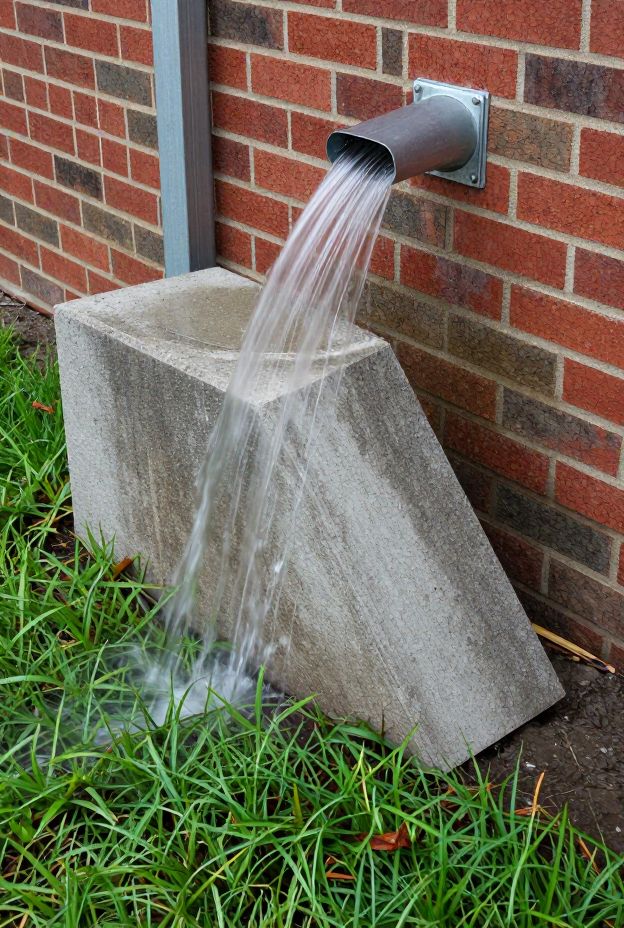
2. Install a Splash Block
A splash block is that flat, angled concrete or plastic pad you place right at the end of your downspout. It catches the water rushing out and directs it away from your home instead of letting it crater the soil and pool near your foundation.
Splash blocks are cheap, durable, and require zero maintenance — which is basically my love language in home improvement. You just set it down and forget it.
The key is positioning. Make sure the block angles away from your house. Sounds obvious, but you’d be amazed how many people install them backwards :/
- Place with the low end pointing away from the house
- Reposition seasonally if frost heave shifts the block
- Replace cracked blocks — water will find the weak spots
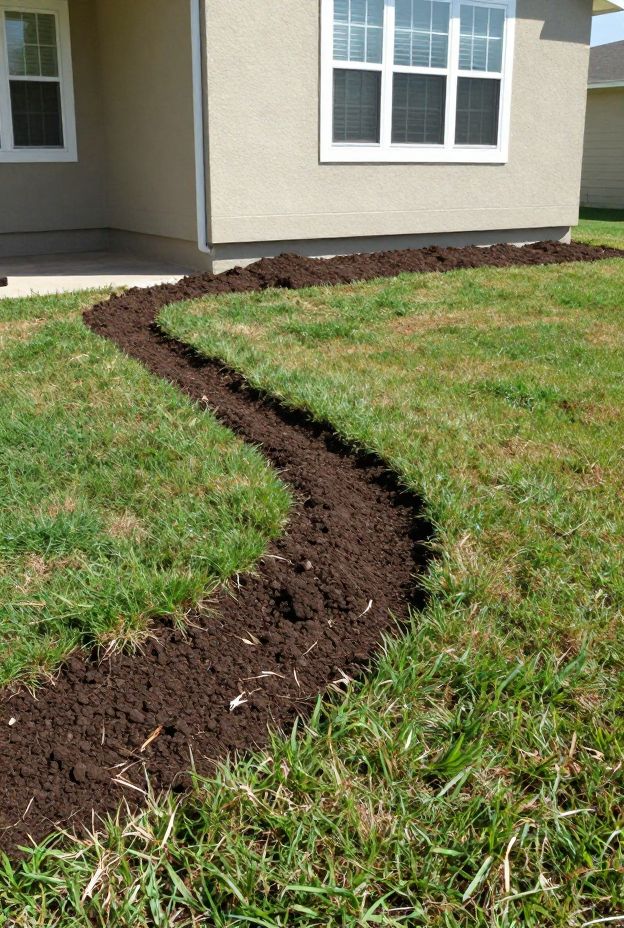
3. Use a French Drain to Redirect Water Underground
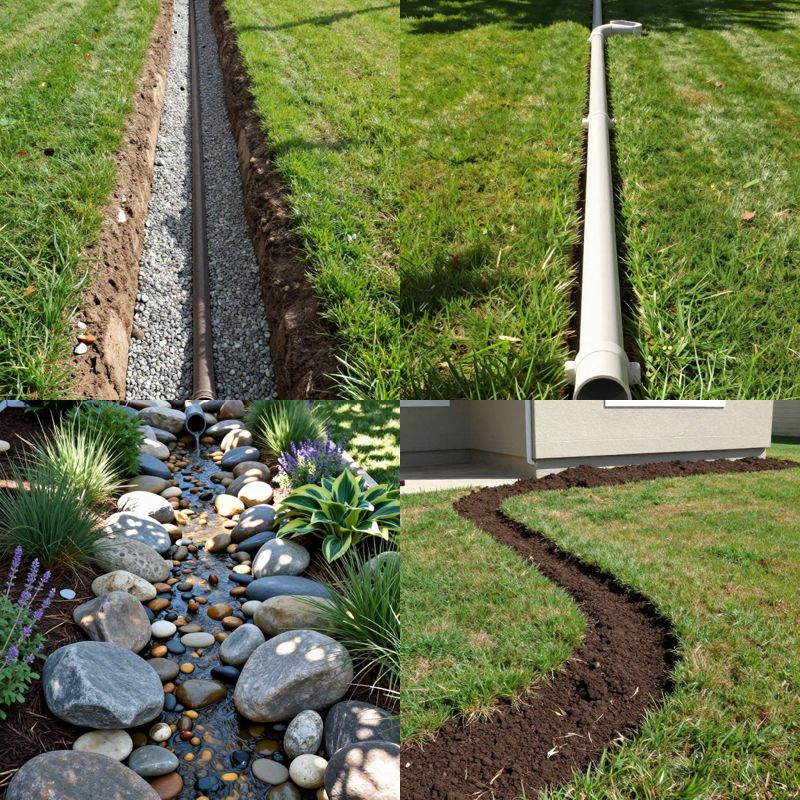
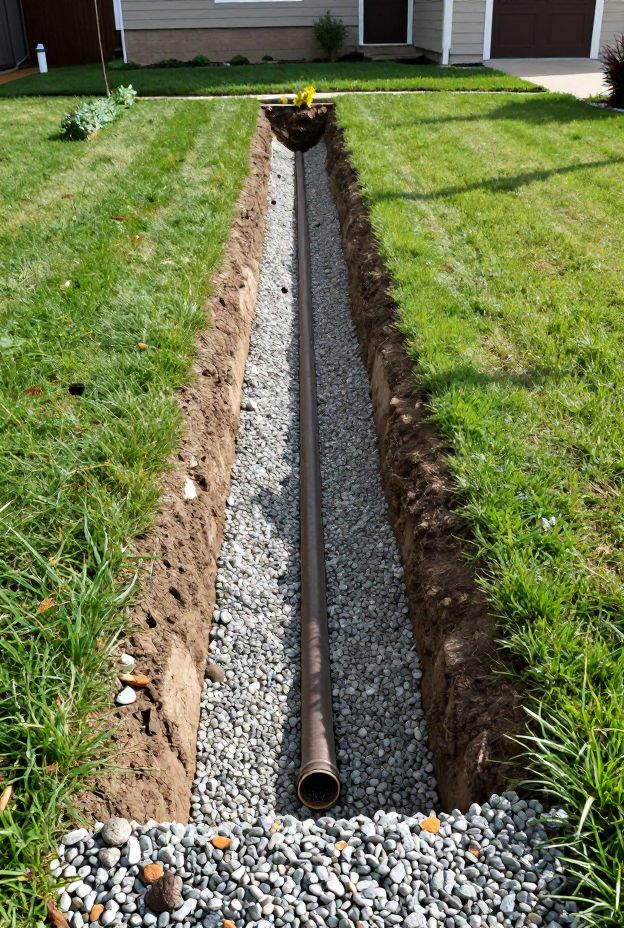
If surface drainage just isn’t cutting it, a French drain takes things underground. You dig a trench, lay a perforated pipe wrapped in landscape fabric, fill it with gravel, and let gravity pull water away from your home and release it in a safer spot.
French drains are the heavy hitters of residential drainage — they handle serious water volume and work even when your yard has a complex slope. They pair beautifully with downspout extensions to create a complete drainage system.
Yes, digging a trench is actual work. But if you’re dealing with chronic water pooling near your foundation, a French drain is often the most permanent solution you’ll find.
French Drain Quick Tips
- Wrap perforated pipe in sock filter to prevent clogging
- Use washed gravel (not pea gravel) for best drainage
- Direct the outlet to a dry well, rain garden, or street drain
- Depth should typically be 18–24 inches for most residential yards
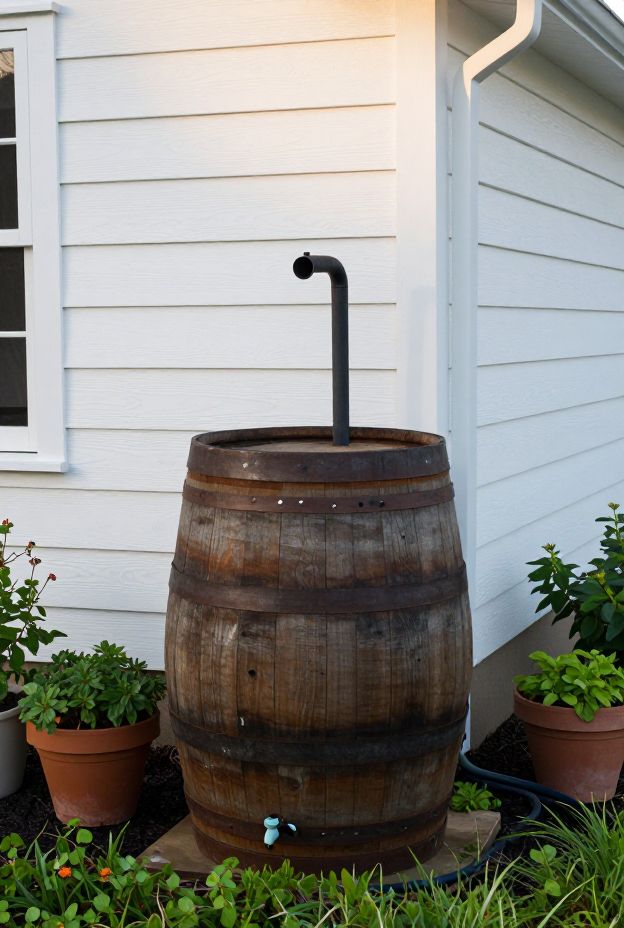
4. Try a Rain Barrel or Cistern System
Here’s an idea that actually earns its keep twice — a rain barrel collects runoff from your downspout and stores it for garden use later. You protect your foundation from water damage AND you get free irrigation water. Honestly, why isn’t everyone doing this?
You simply connect the barrel to your downspout with a diverter kit. When the barrel fills up, the overflow redirects away from your foundation automatically. It’s a smart, self-managing system.
FYI, a standard 50-gallon barrel fills up faster than you’d think in a decent rainstorm. If you get serious rainfall, consider linking two or three barrels together for overflow capacity.
- Choose a barrel with a spigot at the bottom for easy hose connection
- Use a screen lid to prevent mosquito breeding
- Empty the barrel before winter to avoid freeze damage
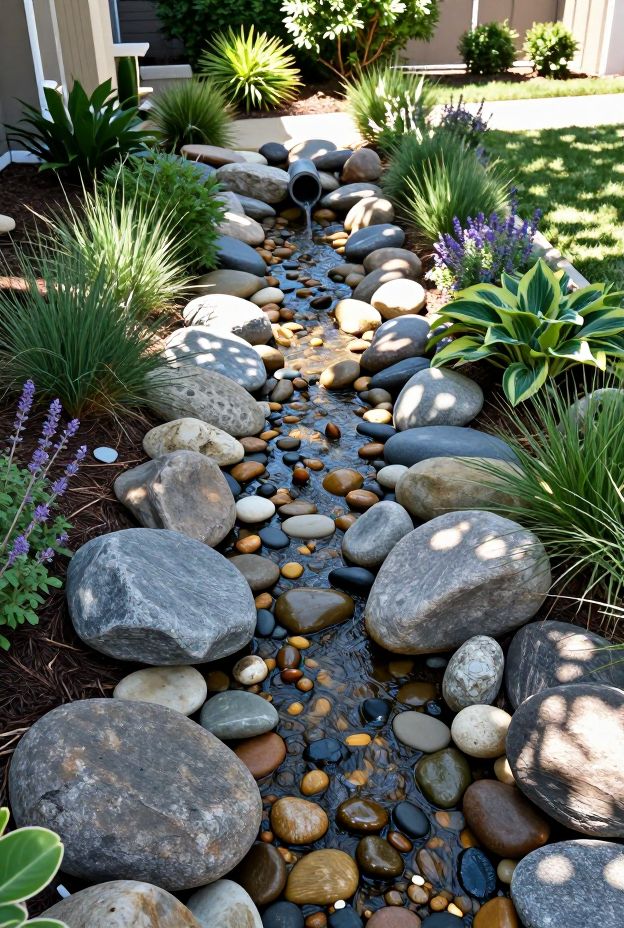
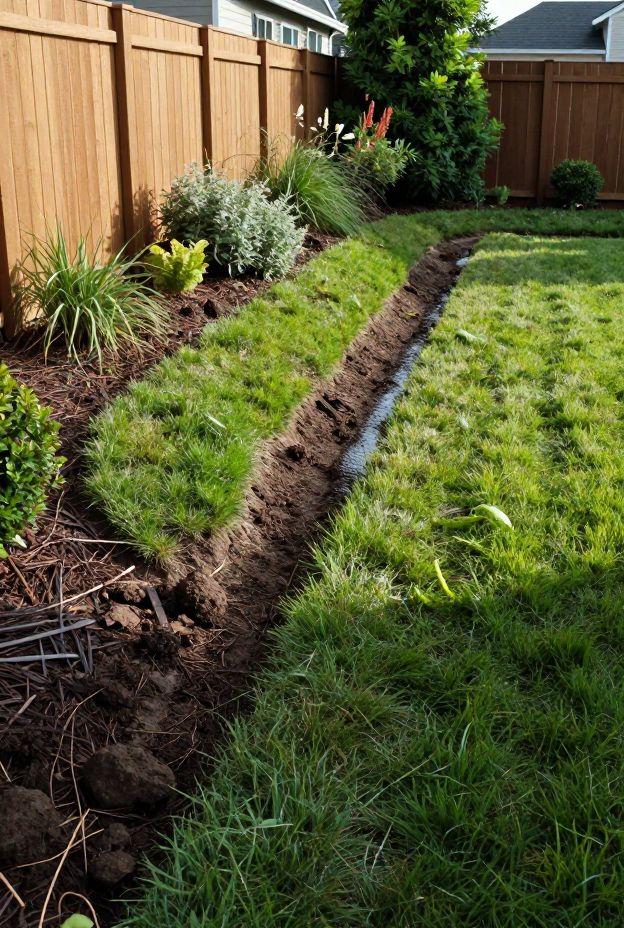
5. Build a Dry Creek Bed
A dry creek bed is one of those drainage solutions that actually makes your yard look better, not worse. You shape a shallow channel in the direction you want water to flow, line it with landscape fabric, and fill it with decorative river rock or stones.
The creek bed guides water away from your foundation while blending right into your landscaping. It mimics a natural stream path, so it looks intentional rather than patched together.
I’ve seen well-designed dry creek beds become genuine focal points in a garden. You’re solving a drainage problem and getting a landscape feature — that’s a solid deal.
How to Build a Basic Dry Creek Bed
- Mark the path leading water away from your downspout and foundation
- Dig a shallow trench, roughly 6–12 inches deep and 18–24 inches wide
- Lay landscape fabric to suppress weeds
- Fill with a mix of large river rocks and smaller gravel
- Edge with native plants for a finished, natural look
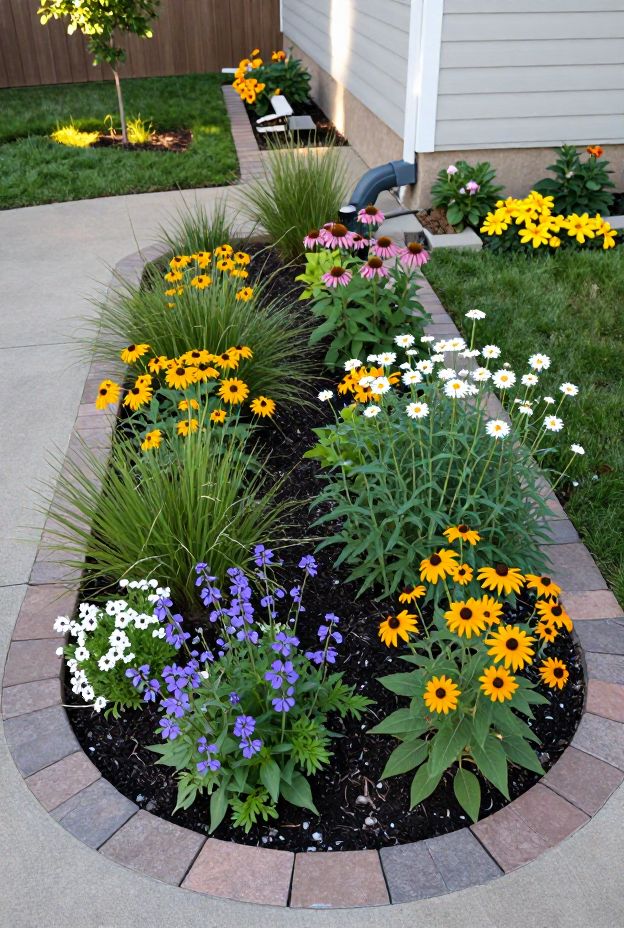
6. Create a Rain Garden
A rain garden is a shallow, planted depression that collects water from your downspout and lets it soak slowly into the ground. It’s designed to handle the burst of water from a rainstorm and filter it naturally through the soil, rather than letting it rush toward your foundation.
You plant it with native, water-tolerant plants — things like coneflowers, black-eyed Susans, and ornamental grasses. These plants handle wet feet during rain and dry spells between storms without complaining.
Siting a rain garden matters a lot. Position it at least 10 feet from your foundation and in a naturally low spot where water already tends to collect. That gives it the best drainage performance.
- Size the garden to handle at least the first inch of runoff from your roof
- Native plants outperform non-native species in rain garden conditions
- Add a layer of mulch to slow water and reduce evaporation
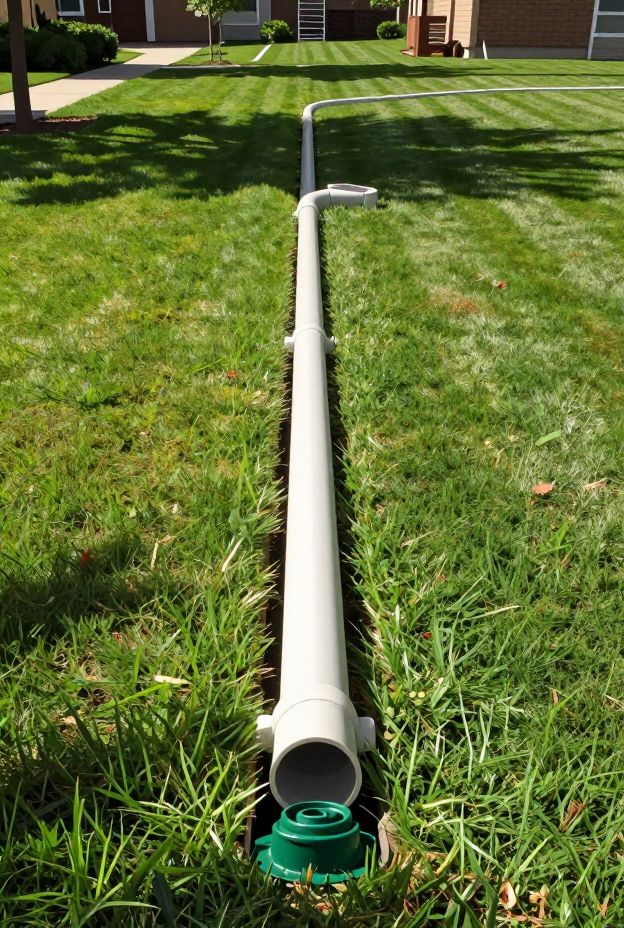
7. Install an Underground Drainage Pipe
Sometimes you need water to travel a significant distance underground before it releases. An underground corrugated or PVC drainage pipe connects directly to your downspout outlet and carries water silently under your yard to a designated outlet point.
This is one of the most invisible and effective long-term drainage solutions you can install. Nobody sees it, it doesn’t affect your landscaping, and it works every single time it rains.
The installation does require some digging and planning, but the result is a permanent, low-maintenance system. Pop-up emitter caps at the outlet end open when water flows and close when dry, which keeps critters out of the pipe.
- Use rigid PVC for long runs to maintain consistent slope
- Maintain a minimum slope of 1% (1 inch per 8 feet) to keep water moving
- Install cleanout access points every 50 feet for maintenance
- Solid pipe beats perforated for this application — you want water to travel, not soak in
8. Grade Your Yard Away from the Foundation
Ever notice how water always runs toward the lowest point? If your yard slopes toward your house, even the best downspout extensions won’t fully solve your problem. Proper yard grading ensures the ground itself directs water away from your foundation — the way it should have been built in the first place.
The standard recommendation is a 6-inch drop over the first 10 feet from your foundation. You can achieve this by adding and compacting topsoil against the base of your house and sloping it outward.
This fix costs very little if you DIY it with a load of topsoil. And it works 24/7 with zero maintenance — just pure physics doing the work for you.
9. Add a Berm or Swale
A berm is a raised mound of soil that acts as a barrier to redirect water flow. A swale is the opposite — a shallow channel that guides water in a specific direction. Together, a berm-and-swale system gives you total control over how water moves across your yard.
You build the berm uphill from the area you want to protect, and the swale sits beside or below it to carry water away. It’s a strategy borrowed straight from permaculture, and it works exceptionally well in yards with complex drainage challenges.
Seed the berm and swale with grass or plant them with low ground cover to hold the soil in place. Bare soil erodes fast, which would defeat the whole purpose.
- Berms should be at least 18 inches high and gently sloped on both sides
- Swales need the same minimum 1% slope to prevent standing water
- Combine with a French drain inside the swale for high-volume drainage
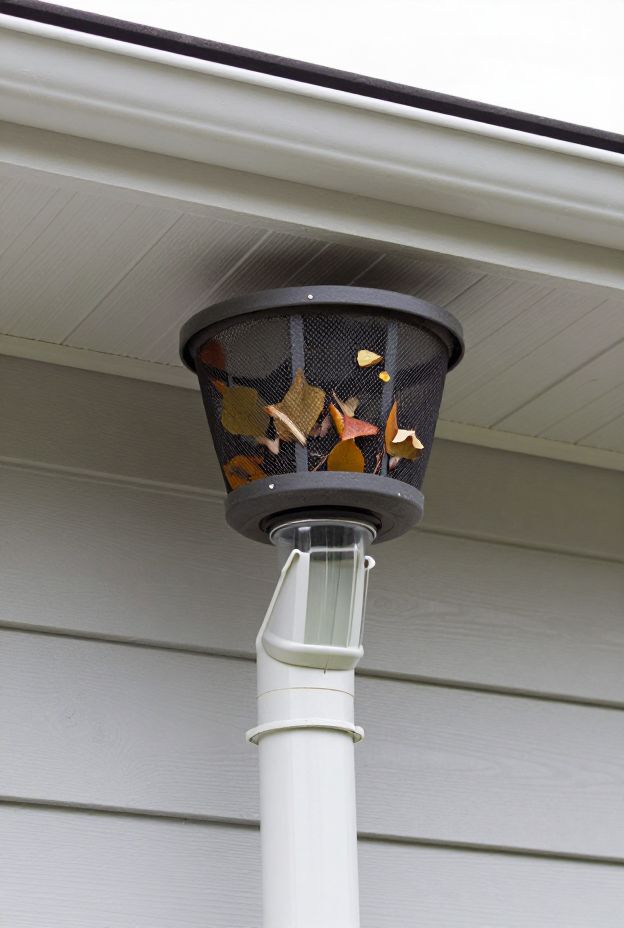
10. Use a Downspout Filter and Leaf Guard
Here’s something people overlook — a clogged downspout is just as dangerous as no downspout at all. When leaves and debris block the pipe, water backs up, overflows at the gutter, and falls right next to your foundation. All your drainage work becomes pointless.
Downspout filters sit inside the top of the downspout opening and catch debris before it enters the pipe. Leaf guards install over the entire gutter to stop most material from getting in at all.
I clean my downspout filters twice a year — spring and late fall after the leaves drop. It takes about 10 minutes and prevents hours of drainage headaches. Totally worth it 🙂
- Check downspouts after every major storm during leaf season
- Foam or mesh inserts both work well as downspout filters
- Consider snap-in filter baskets for easiest removal and cleaning
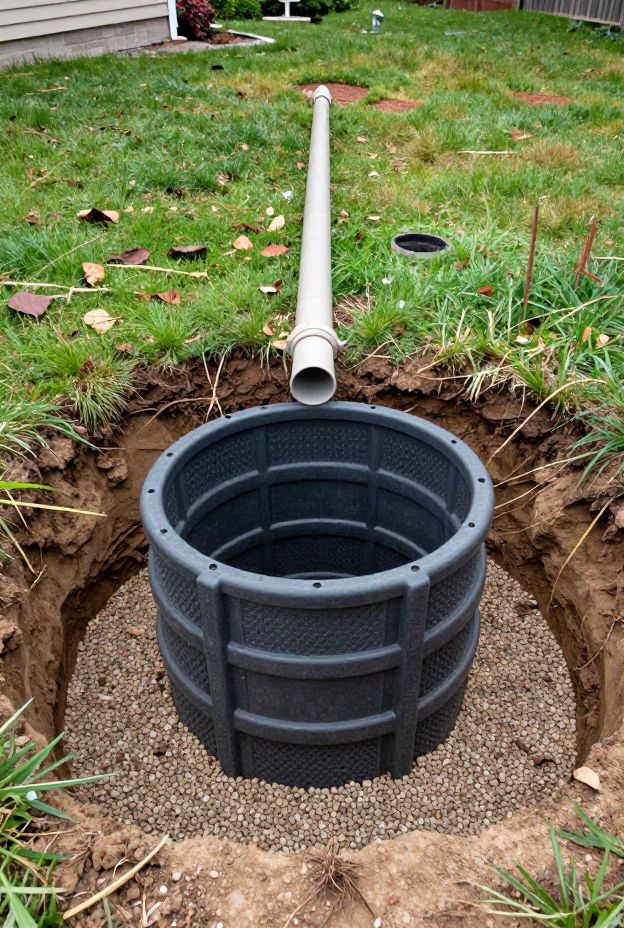
11. Connect Downspouts to a Dry Well
A dry well is an underground pit filled with gravel or a prefabricated perforated container that collects and slowly disperses water into the surrounding soil. When you connect your downspout directly to a dry well, you give large volumes of rainwater a safe place to go — far from your foundation.
This system handles even heavy rainstorms because the dry well absorbs the initial surge and releases water gradually. It works best in soil with decent percolation, so do a quick percolation test before you commit to digging.
Dry wells last decades with minimal attention. The main thing to watch for is soil saturation during extremely wet seasons — if the surrounding soil is already waterlogged, the dry well won’t drain properly until conditions improve.
Dry Well Installation Basics
- Position the dry well at least 10 feet from your foundation
- Dig to a depth of 3–4 feet minimum for adequate volume
- Use a prefab plastic dry well container or fill with washed gravel
- Cover the top with landscape fabric and soil to prevent collapse
- Run a solid pipe from your downspout outlet to the dry well inlet
Protect Your Foundation Before It’s Too Late
Your foundation is the most expensive part of your home to repair. Everything above it — every wall, roof, and room — depends on that foundation staying solid and dry. So why gamble with poor drainage?
Start with the easiest fixes first — extend your downspouts, add splash blocks, and check your yard grading. Then layer in bigger solutions like French drains, dry wells, or rain gardens if your drainage challenges run deeper.
You don’t need to implement all 11 ideas at once. Pick the solutions that match your yard’s specific problems and your budget, then work through them systematically. Every improvement you make reduces the risk of water damage and keeps your foundation healthy for decades to come.
Your future self — the one who never has to call a foundation repair contractor — will seriously thank you for taking action today.