So you’ve fallen for succulents, huh? Can’t blame you. These little hardy plants look absolutely gorgeous, they’re practically indestructible (well, almost), and they won’t judge you if you forget to water them for a week or two. I’ve been growing succulents for years now, and honestly, they’ve saved my plant-loving soul more times than I can count. Whether you’re a total newbie or just looking for fresh ideas to display your growing collection, I’ve got you covered with these beginner-friendly succulent gardening ideas that actually work.
1. Start with a Classic Terrarium
Terrariums are hands down one of the easiest ways to start your succulent journey. You grab a glass container (mason jars work perfectly, FYI), layer some pebbles at the bottom for drainage, add activated charcoal to keep things fresh, throw in some cactus soil, and pop your succulent in. Done.
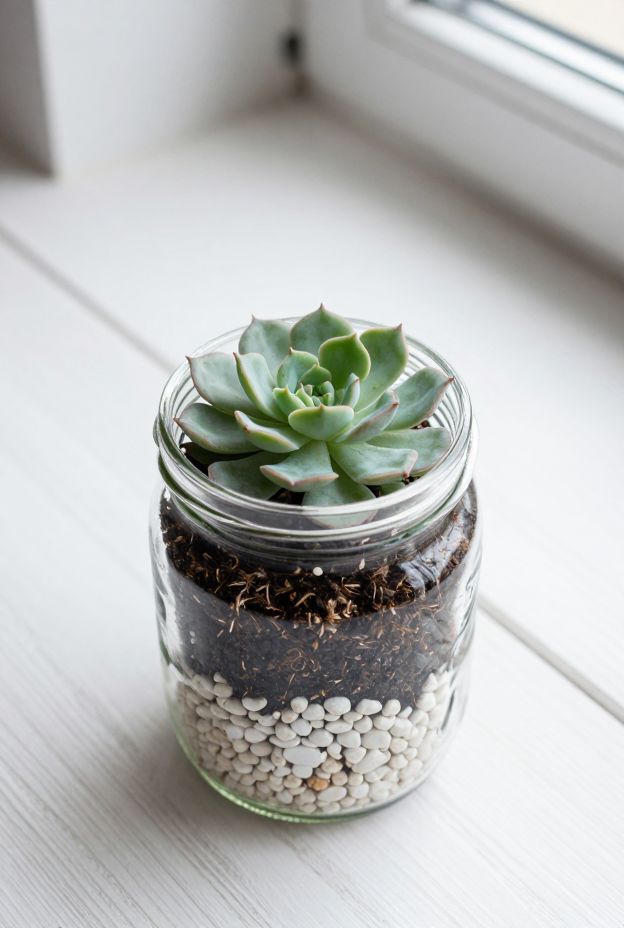
The best part? You can see exactly what’s happening with the roots and soil, which helps you learn how these plants behave. I started with a simple mason jar terrarium on my kitchen counter, and it taught me more about succulent care than any article ever could. Just remember to avoid sealing the container completely because succulents need airflow to thrive.
Pick smaller varieties like Echeveria or Haworthia for terrariums. They stay compact and won’t outgrow their space too quickly, giving you that perfect little desert landscape in a jar.
2. Create a Succulent Bowl Garden
Want something that looks impressive but takes zero advanced skills? Succulent bowl gardens are your answer. You get a wide, shallow bowl (make sure it has drainage holes), fill it with cactus soil, and arrange different succulents together like you’re creating a tiny landscape.
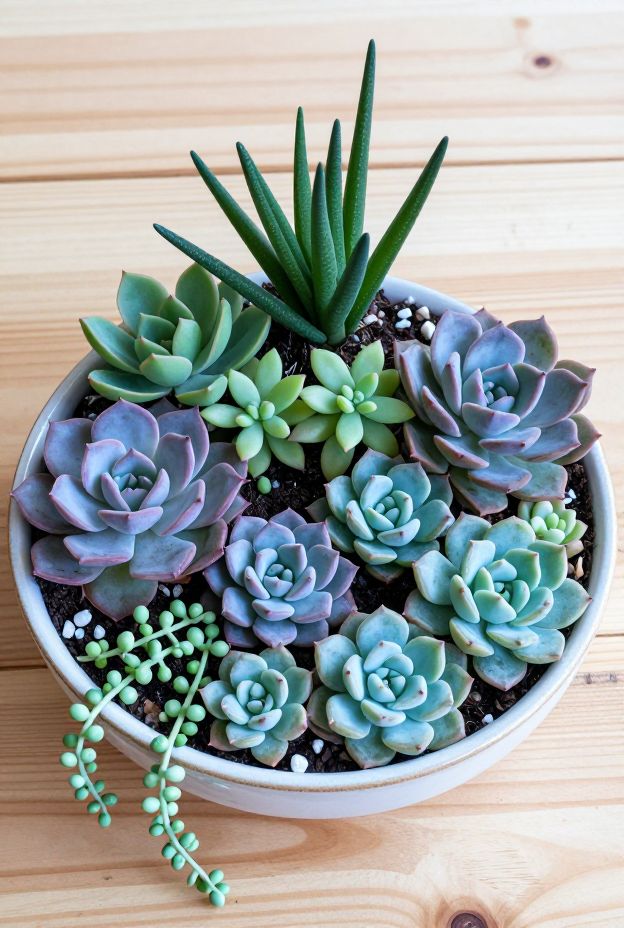
The trick here is mixing textures and heights. Put taller succulents toward the center or back, let trailing varieties cascade over the edges, and fill gaps with smaller rosette-shaped ones. I love using a mix of blue-green and purple-toned succulents because the color contrast looks stunning without any extra effort.
This arrangement style also makes watering super easy since all your plants share the same soil and drainage system. You water once, and everyone’s happy. Simple as that.
3. Try Wall-Mounted Planters
Here’s the thing about small spaces: you run out of horizontal surfaces pretty fast. That’s where wall-mounted planters come to the rescue. Those modern geometric wall pockets you see everywhere? They’re not just for looks – they actually position your succulents exactly where the light hits best.
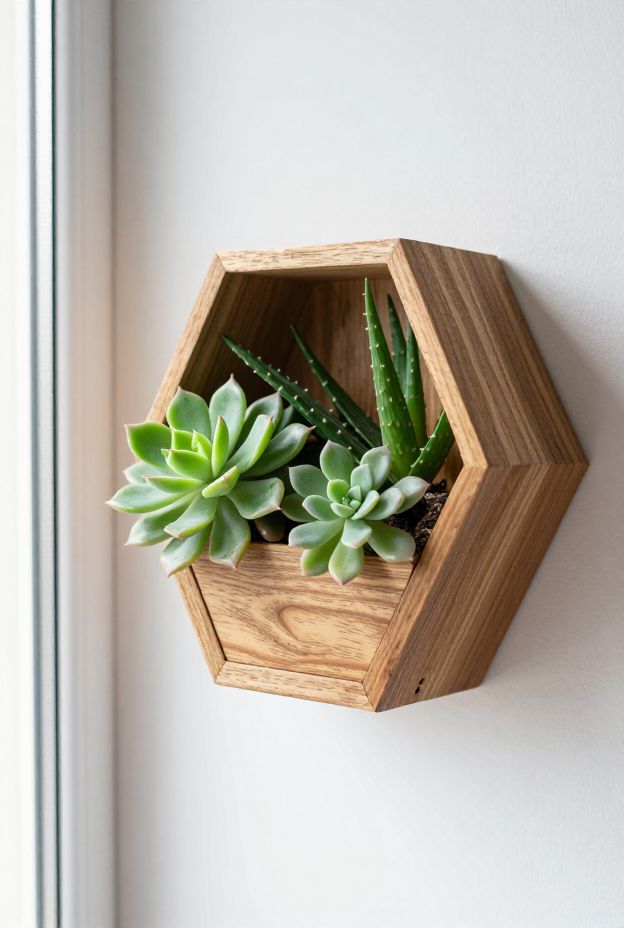
I struggled with finding bright spots in my place until I mounted a few planters on a south-facing wall. Game changer. Your succulents get the four to six hours of bright light they crave, and you free up valuable shelf and table space for, you know, actual functional stuff.
Look for wall planters with good drainage or plan to water carefully. You don’t want water dripping down your wall every time you hydrate your plants (trust me on this one :/ ).
4. Build a Rock Garden Display
Rock gardens and succulents go together like coffee and mornings. The combination just makes sense because it mimics the natural desert environment where these plants actually thrive. You arrange rocks of different sizes to create levels and crevices, then tuck succulents into the spaces.
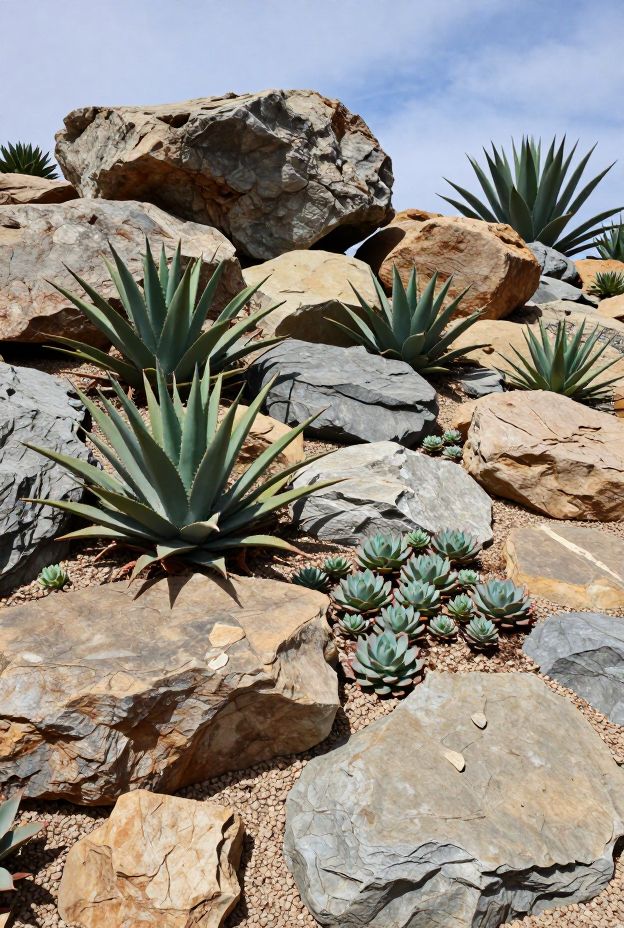
This setup isn’t just pretty – it’s practical. The rocks help with drainage, prevent soil from getting too soggy, and they retain heat during the day to keep your succulents cozy. Plus, you can grow varieties like Aloe, Agave, and Sedum that look absolutely sculptural against stone.
Start small with a corner of your garden or a large container filled with rocks and gravel. You don’t need a massive space to create something that looks professionally designed. The natural, rugged look sells itself.
5. Use Vintage or Quirky Containers
Who says you need fancy planters? Some of my best succulent displays live in repurposed containers – old teacups, vintage tins, wooden crates, even an ancient boot I found at a thrift store. Succulents are chill about their homes as long as you handle drainage properly.
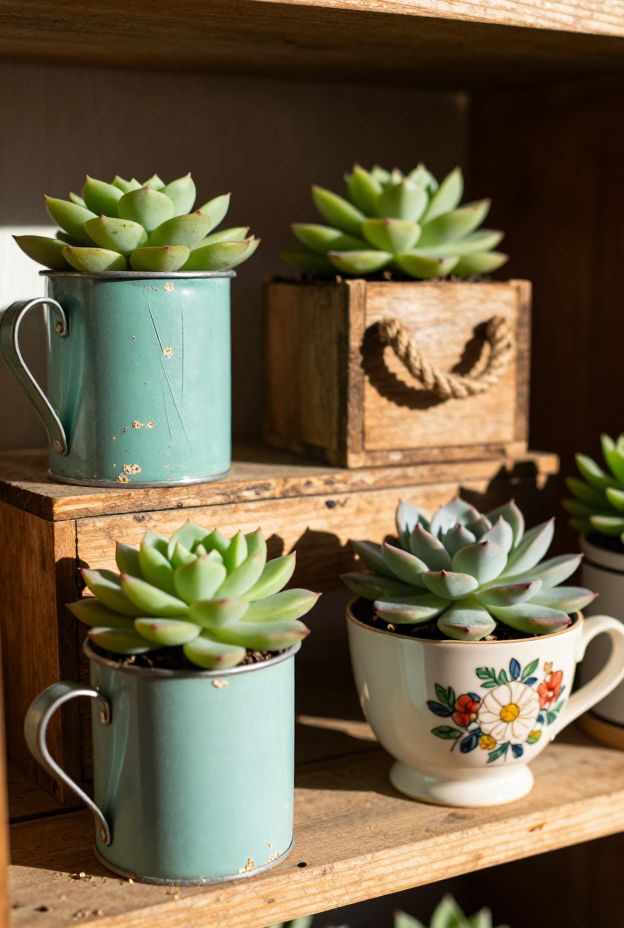
The key is drilling drainage holes if the container doesn’t have them, or layering pebbles and sand at the bottom to prevent water from pooling. I’ve killed exactly two succulents by skipping this step (RIP little guys), so learn from my mistakes and prioritize drainage every single time.
Quirky containers add personality to your space and make great conversation starters. IMO, a succulent in a vintage McCoy planter beats a generic plastic pot any day of the week.
6. Design a Vertical Living Wall
Ready to level up? Vertical succulent walls look absolutely incredible and they’re not as complicated as you’d think. You can buy pre-made wall hangers or DIY one using wood frames and wire mesh to hold the soil and plants in place.
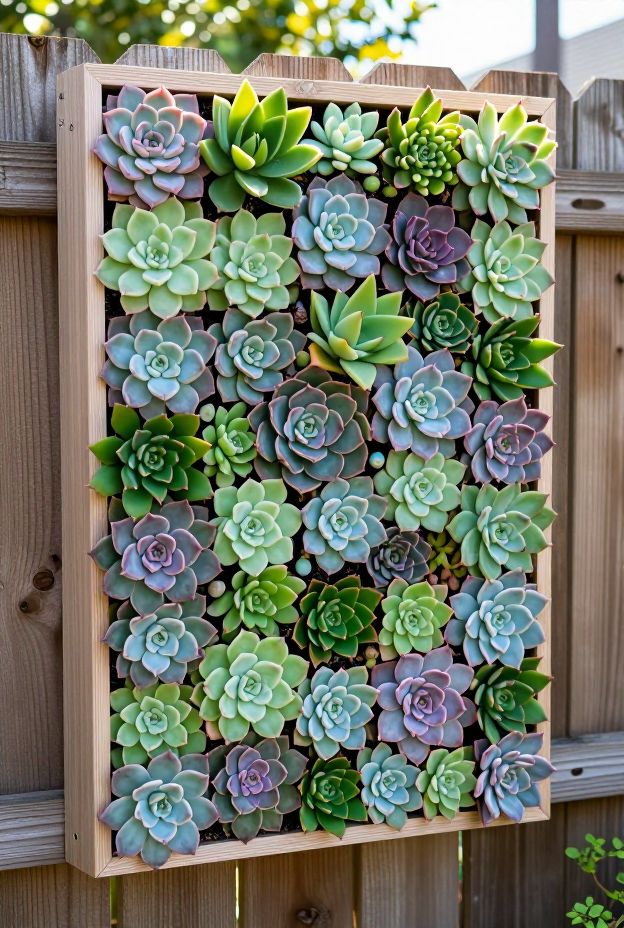
These living walls work brilliantly for small outdoor areas where ground space is limited. You mount the frame on a fence or exterior wall, plant your succulents in the pockets or grid, and watch them fill in over time. The vertical arrangement also keeps plants away from ground-level pests and critters.
Give the wall a few weeks to establish before hanging it vertically – let the roots grab hold of the soil while it’s lying flat. Once everything’s settled, mount it up and enjoy your gorgeous green statement piece.
7. Create Mini Arrangements as Gifts
Want to spread the succulent love? Mini succulent arrangements make perfect gifts for literally anyone. Housewarming present? Succulent. Thank you gift? Succulent. Random Tuesday because you appreciate someone? You guessed it – succulent.
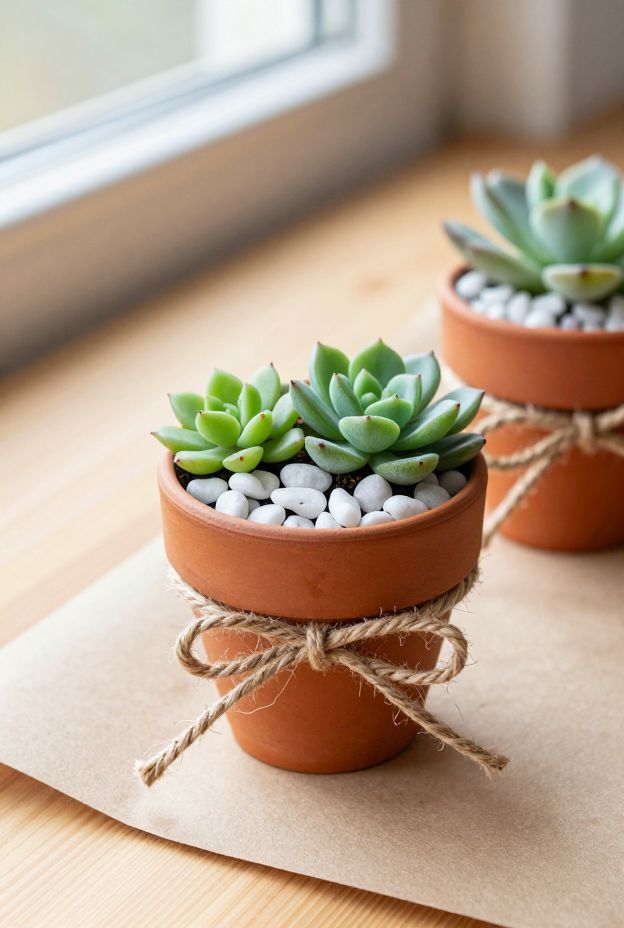
I keep a stash of small pots and propagated succulents ready to assemble into quick gift arrangements. You plant two or three tiny succulents together, top the soil with decorative pebbles, and tie a ribbon around the pot. Takes ten minutes, costs almost nothing, and people absolutely love receiving living gifts.
The best part is watching your friends become succulent enthusiasts themselves. It’s contagious 🙂
8. Try a Desert-Style Garden Bed
If you’ve got outdoor space and you live somewhere with decent drainage, a desert-style garden bed is pure magic. You’re basically creating a water-wise landscape using cacti, large succulents, and drought-tolerant plants all mixed together.
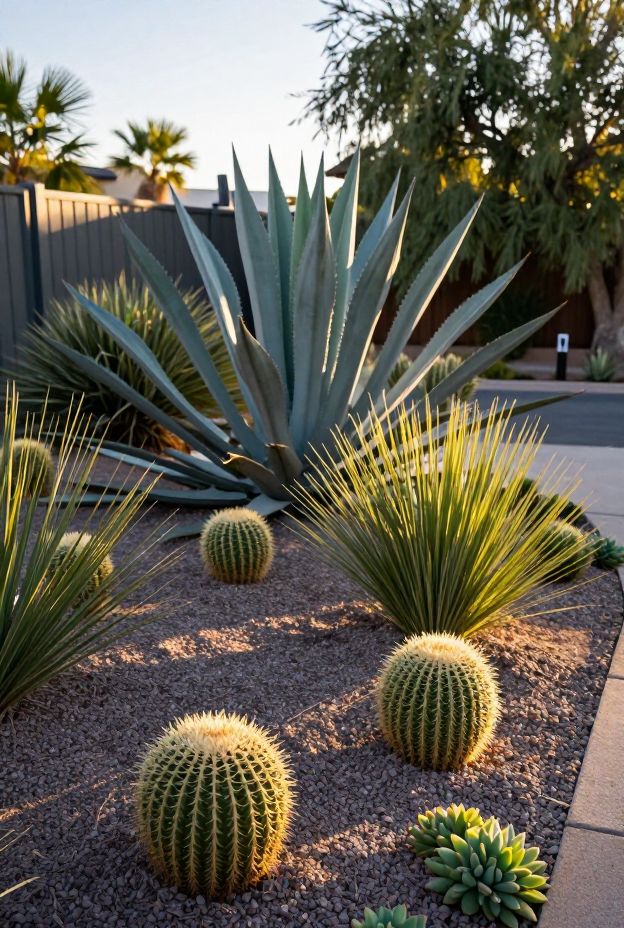
This setup conserves water like a boss while looking dramatically beautiful year-round. Plant varieties like Agave, Yucca, and Prickly Pear Cactus for bold architectural shapes, then fill in with smaller succulents and ornamental grasses. The contrasting textures create visual interest without requiring constant maintenance.
Make sure your bed has excellent drainage by adding sand or gravel to the soil, and position it on a slope if possible. North-facing (or south-facing in the northern hemisphere) sloping sites work best because they maximize sun exposure.
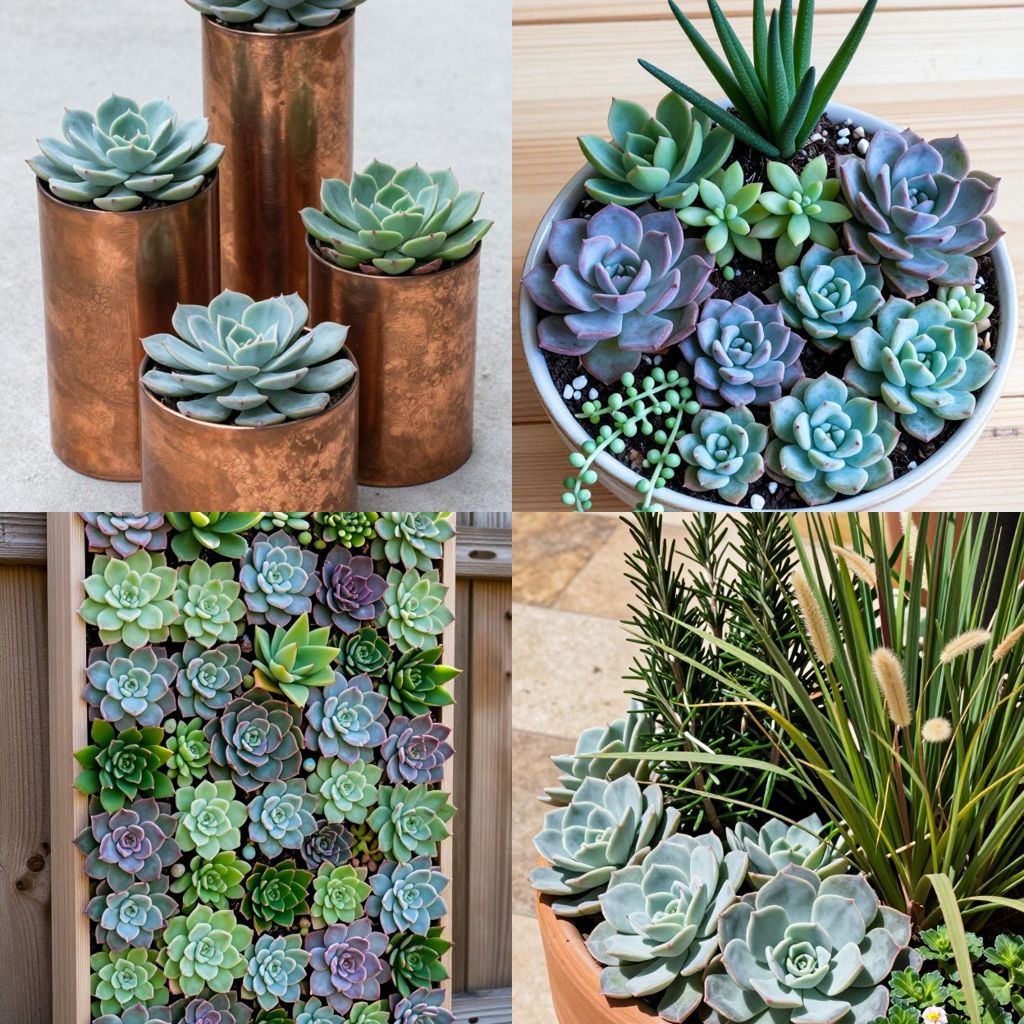
9. Experiment with Copper or Metal Planters
Metal planters – especially copper ones – add a modern, industrial vibe to your succulent displays. The warm tones of copper complement the cool blues and greens of succulents perfectly, and the material naturally develops this gorgeous patina over time.
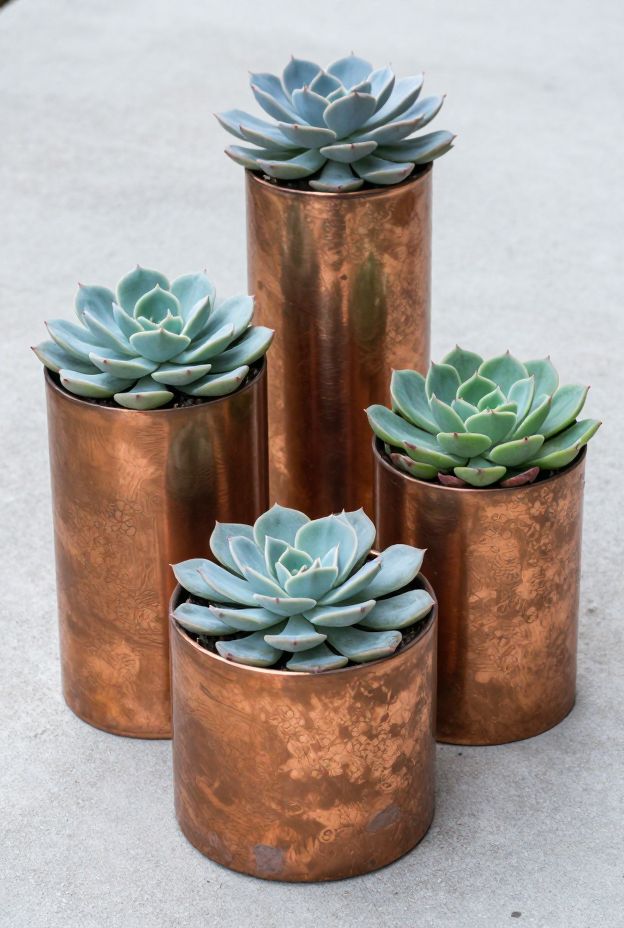
I moved several of my succulents into copper containers last year, and the instant upgrade in aesthetic was honestly shocking. Same plants, different pots, completely transformed look. Metal planters also tend to have good weight to them, so they’re stable and won’t tip over easily.
Just watch out for drainage (are you sensing a theme here?). Metal containers often don’t come with pre-drilled holes, so you’ll need to add them yourself or get creative with your layering technique to prevent root rot.
10. Make a Mediterranean-Inspired Display
Love that relaxed, sun-soaked Mediterranean garden vibe? You can totally recreate it using succulents mixed with herbs and ornamental grasses. Think Senecio Serpens (Blue Chalksticks) paired with rosemary, feather grass, and wallflowers.
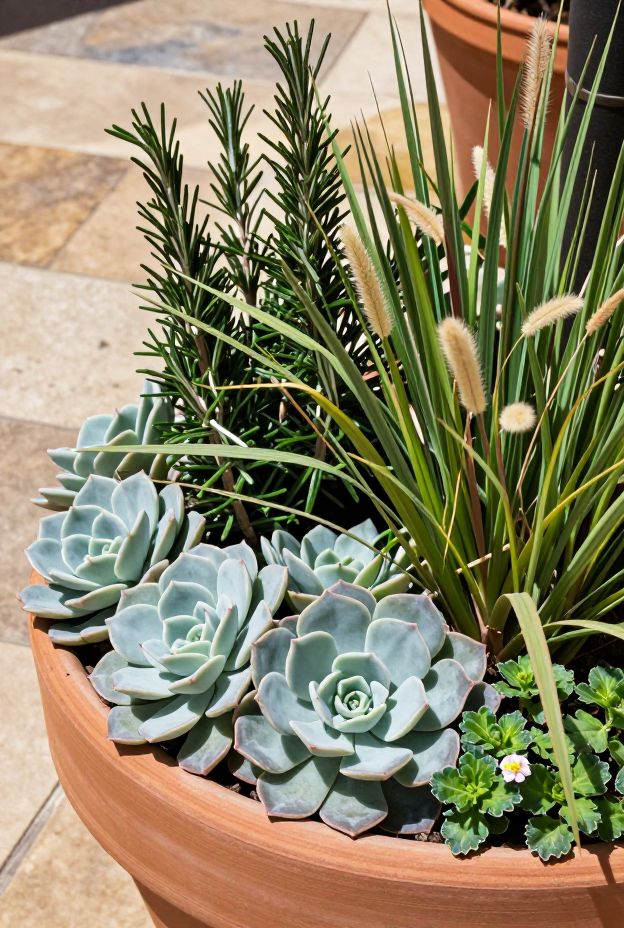
This style works beautifully because all these plants share similar care requirements – they love sun, prefer drier soil, and don’t need constant fussing. The combination creates layers of texture and height that look intentionally designed even if you’re just winging it.
Position taller grasses and succulents toward the back, herbs in the middle, and low-growing succulents along the front edge. This creates depth and makes everything visible instead of hiding smaller plants behind bigger ones.
11. Start a Propagation Station
Here’s a secret: once you’ve got a few succulents, you can multiply your collection for free through propagation. You literally pull off a healthy leaf, let it dry for a day or two, place it on top of soil, and wait for baby succulents to sprout. It feels like actual magic.
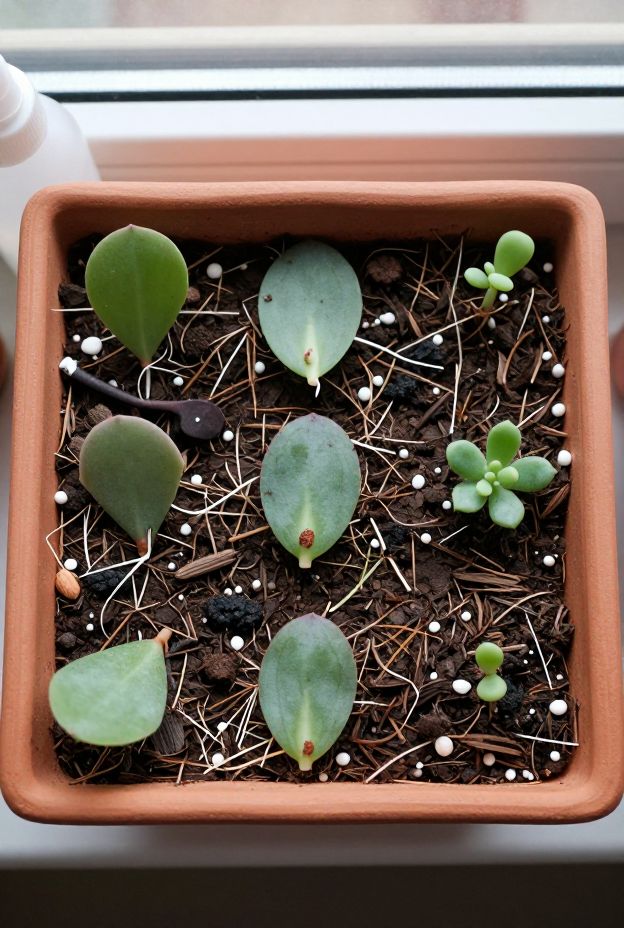
I keep a shallow tray dedicated to propagation, and it’s become my favorite “garden” to check on. Watching tiny roots and rosettes emerge from a single leaf never gets old. You can propagate dozens of new plants from just one mature succulent, which means endless gifts, trades, and expansion of your own collection.
The propagation process teaches you patience (it takes weeks, not days) and gives you serious bragging rights when friends ask where you got all your plants. “Oh, I grew them myself” sounds way cooler than “I bought them at the garden center,” doesn’t it?
Final Thoughts
Succulent gardening really is one of the most beginner-friendly ways to get into plants. These tough little survivors forgive your mistakes, they look stunning with minimal effort, and they offer endless possibilities for creative displays. Whether you start with a single terrarium or go all-in with a vertical living wall, you’re setting yourself up for success.
The beauty of succulents is that you can start small, learn as you go, and expand your garden at your own pace. Each idea I’ve shared here taught me something valuable about plant care, design, and how to work with the space I actually have (not the space I wish I had). Pick one idea that excites you, grab some succulents, and just start. You’ll figure out the rest along the way.
And remember: if you kill a succulent or two while learning, you’re in good company. We’ve all been there. The difference between a beginner and an experienced gardener is just a few dead plants and the lessons they taught us. Happy planting!